Search This Blog

Wednesday, February 20, 2019

BOWLING FOR BUNNIES

Bunny Bowling Panel


Can't resist but just have to show you this wonderful panel - Bunny Bowling. Or rather I'd like to call it Bowling for Bunnies!  This is a full yard panel that contains 6 pastel color bunnies that you create/stuff and make them into bowling pins.  Get a second panel and you can make a full bowling pin set - haha!  Great time of year to make for Easter and/or simply Spring (because yes, spring is coming).  Make these as gifts for your special kidlet(s) and watch them delight in bowling these bunnies down.  Even make your own plush bowling ball if you wish.  Bunny Bowling panel is designed by Quilting Treasures.

Tuesday, September 6, 2016

Simple Quilts, Complex Fabric by Paula Nadelstern

This blog was created on August 30, 2016 and first posted on C&T Publishing's blog.  This blog post by Paula Nadelstern is an introduction to her newest book - Fabricadabra, Simple Quilts, Complex Fabrics.  This will be available in late October, 2016.  However it is available for Preorder now. Preorder now, so you can be one of the first to have.  Very exciting stuff, this!
I’ve been making quilts since 1968. Until 1986 I was a dabbler who tried every traditional block she read about. That’s when I met a gorgeous, bilaterally symmetrical Liberty of London print, the inspiration for my detour toward a kaleidoscopic quilt series. But the charm of the traditional quilt has always stayed with me. Combining the complexity of my Benartex fabric collections with quilts of simple construction yielded results that seemed book-worthy—although (between us) I’d always rather be making a quilt than writing about making it.
An Agreement of Butterflies, designed and pieced by Paula Nadelstern, quilted by Rebecca Gore, 34 1/2’’ x 35 1/2’’, 2015
Let’s establish upfront: I am a Patternista—I made that term up, but to me it means I have an extreme aesthetic and intellectual fascination with patterned textiles. I design them, I collect them, and my art quilts are filled with repeated decorative designs. Finding an unexpected relationship between two patterns or creating a pairing that yields a more exquisite or whimsical result than the individual patterns on their own stirs my imagination and makes me happy.
The appeal of this design strategy led me to one of my signature techniques: a tendency to obscure the piecing seams rather than highlight them. This design strategy is one of many explored in depth in my new book, Fabricadabra—Simple Quilts, Complex Fabric, along with my personal piecing policies and functional fabric categories. The large gallery section showcases a diverse array of stunning 36”-square quilts made of simple shapes. The quilts may seem complex, but the clear layout illustrations beg to differ. Not all of the quilts were made or quilted by me. I got a lot of help from my friends. I hope you’ll find them creative, wonderful, and inspiring.
A Visual Palindrome, designed and pieced by Paula Nadelstern, quilted by Beth Carney, 36” x 36”, 2013
Layout for A Visual Palindrome
  • FABRICADABRA
  • PAULA NADELSTERN

Wednesday, February 10, 2016

MYSTERY SHUFFLE - BLOCKS 2 & 3

Block 3
Block 2


We are releasing 2 Mystery Shuffle blocks this week, and from here on out we will release 3 at a time once each month.  So look for the next set of 3 Mystery Shuffle blocks in March. 
 
Remember you have only 2 weeks in which to download the FREE instructions.  So be sure to do that before 2/23/16 for both Blocks 2 & 3. 
 
Block 2 was designed by Me & My Sisters Designs.  As you can see it just entails straight cutting and straight seams.
 
So this is a great opportunity for you to pay attention to your strip cutting. Pay attention to where you cut your fabric edge - on the inside or outside, or right on the line on the ruler? It doesn't matter, but the key here is be consistent throughout this whole quilt. The other key is to use the same ruler because sadly there can be variations in the markings between different brands. The same applies when sewing your 1/4" seam - do you consistently place your fabric on the inside, outside or right on the line marking on your machine. Again, it doesn't matter, just be consistent.

Also pay attention to your pressing. Generally the standard rule of thumb is to press both seams to the darker fabric. However if you are going to have many seams come together, you may wish to press your seam open. That helps to reduce the overall bulk.

Here are some suggested tools:

• We're so happy to see this product! It is my favorite tool. It lives on my machine to help me sew a straight line. I truly can't live without it -
Sew Straight. And for Block 2 this would be invaluable.
• Or you might like to use the
Qtools Sewing Edge. These are acrylic strips that you can lay right onto your sewing machine. The strip is thick enough so that you can guide your fabric through without it slipping over the edge. This again should help with seam allowance accuracy.

Here's the link to
Block 2.   Scroll down to find where you download the FREE instructions.
 
Block 3 is designed by Sandy Gervais.  And as you can see with this block you will be creating pieced angles.  But don't worry, this is not as hard as it looks.   Everytime you see
 
 
Instead of cutting your fabric on the diagonal, you will be sewing on the diagonal.  Here's one hint - you might wish to sew ever so slightly to the right of your seam guide - just one or two threads width - which will allow you to fold/iron over more fabric thereby keeping your piece square.
 
After you've sewn your line, you then have the option of cutting away the excess fabric in the back or not. Again you might consider whether you want to cut it or not because it helps to keep the piece square, or to size.

Here's the link for Block 3.  Again, scroll down the text until you find the link for the instructions.

Remember you have until 2/23/16 to download both instructions for free.  If you miss a free download, don't worry all of them will be available for purchase at the end of this program.


Wednesday, February 3, 2016

MYSTERY SHUFFLE - BLOCK 1


Just now realized that I could be posting this new program onto our blog. Sorry for the delay, but we have a new Block of the Month type program, called the Mystery Shuffle. Here goes:

This is THE MYSTERY SHUFFLE. This program will run for about 15 months, that is if we stay on top of this. It might run a month or two longer. The reason - there are 30 six inch blocks you must make first. Therefore our game plan is to release a new 6" block every week or every other week. And quite honestly - we might find releasing 2-3 blocks at one time each month might prove easier for all of us in the long run. But we'll start with Block 1 today. The instructions for putting these blocks together is FREE, initially. And since these blocks are so small - you may want to use your own stash. However we have put together small kits (just 1/8 yd strips of fabrics together) that you may purchase from us if you wish. The pricing for each optional kit will vary depending on how many strips are required. Also with each block we will provide you with a few tips and/or notions and tools that might help in making these blocks. This could be a good program for a quilter who is just learning. So the block instructions and finishing kit instructions will all be FREE - initially. All kits, notions and tools are optional. 

But, yes, there is a catch:

• Each new Block (or set of blocks, etc.) will be available for a FREE download for only 2 weeks! Therefore, since today is the launch date of Block 1 - you have until 2/12/16 to download. After February 12, we will remove the downloadable pattern. Kits, notions and tools will still be available though. But don't worry, if you miss a download - at the end of the program they will become available again for purchase. 

  A. Keep in mind, YOU must download the instructions yourself. We will not email it or print it out for you. And if you miss the download even by a minute, please do not ask us to email or print it for you, because we will not.

  B. The other trick, is initially the FREE download will only be accessible via our Facebook page. However for those that do not use social media, after one week, we will provide access to the Block's instructions via one of our eNewsletters. Just remember though - you only have a week to download.

We're looking forward to this. We think this will be fun. Please be sure to tell your friends. "Like" us on Facebook and/or sign up for our enewsletters, so you and your friends don't miss out. So have at it - Block 1 is now available.  You'll find the link to download the free pattern way down towards the bottom of the text.  This download will be available until 2/12/16. For those who do not use social media, the link will become available sometime this week so be sure to read your emails :) Enjoy!!

Tuesday, January 19, 2016

Paula Nadelstern talks about Fantastical Designs Coloring Book

Have to admit - the blog from Bernina - WeAllSew is a great source for us to share on our own blog - especially when it concerns our beloved Paula Nadelstern :)

,

Enjoy this expert of Paula Nadelstern’s Fantastical Designs Coloring book and join the give-away.
On Thanksgiving last year, my older brother told the whole crowd that as a little kid, I was always coloring. He added, with a little smile, that I hummed while I colored. I didn’t grow up to have a musical bone in my body but I’m still coloring, focusing mostly on designing color filled quilts and fabrics.
Coloring Book Give-Away
I’m also a true Patternista, hard-wired to look for patterns everywhere. It’s almost a divine moment in a creative life when it all comes together so neatly. Having a coloring book of my fabric patterns seems like kismet. I hope colorists of all ages will enjoy the juncture of pattern and color as much as I always have.
Fantastical Designs Coloring book by Paula Nadelstern
Why are adult coloring books trending nowadays? Maybe, in our busy lives, there is something soothing and satisfying about a structured activity that offers choice. Facing a blank page can be daunting. Also, it’s not like a crossword puzzle; there is nothing to solve.
Fantastical Designs Coloring book by P Nadelstern
An enlarged version of the current book, FANTASTICAL DESIGNS, will be available mid-January 2016, titled OPULENT BAZAAR by C&T Publishing.

Paula Nadelstern has A Gift For You!

One Fantastical Designs Coloring Book will soon belong to one awesome WeAllSew fan. All you have to do is post a comment below answering the following question:
Why would you use a coloring book?
A winner will be chosen at random on January 22, 2016 and announced the following week!
Good luck!

Thursday, December 17, 2015

Paula Nadelstern's Opulent Ornaments

Here's a nice mood-lifting and seasonal project - Paula Nadelstern's Opulent Ornaments.  All you need is one of her panels and...  taken from Benernina's Blog "We All Sew."  Enjoy

Opulent Ornaments

Enjoy the Opulent Ornaments by Paula Nadelstern!
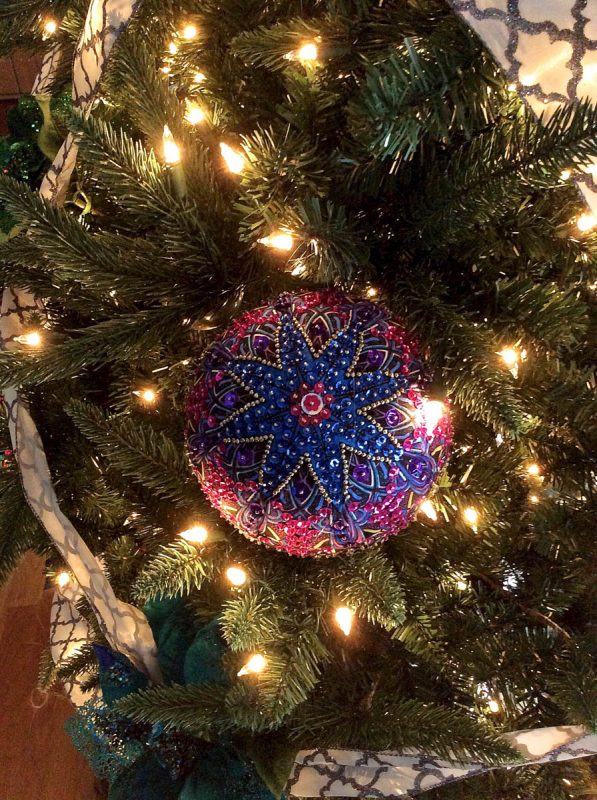
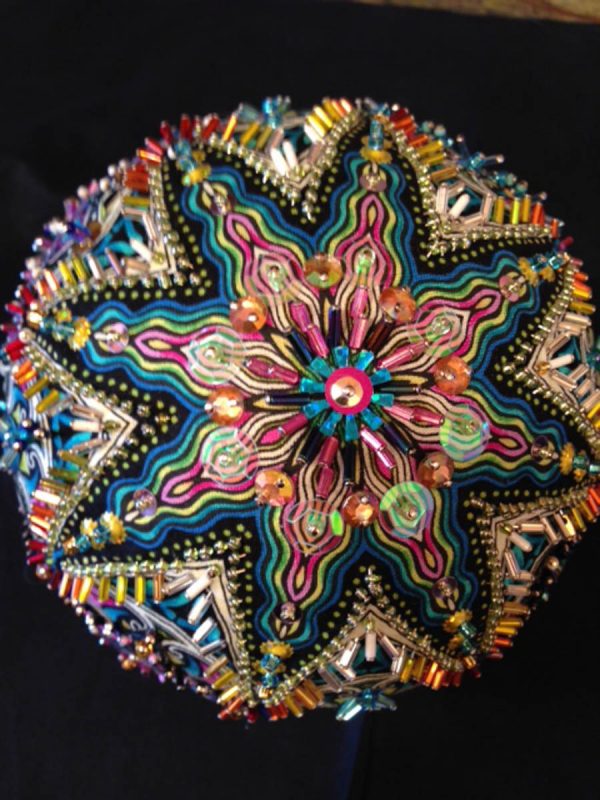
Here’s your chance to get in touch with your inner embellisher. These eye-catching ornaments often trigger nostalgic memories of family members who made some type of embellished Styrofoam ball. This version kicks it up a notch. You’ll intuitively rely on the repetitive flow of shapes and colors from a commercial kaleidoscopic or medallion-like print to create this easy-to-make and visually beautiful object, brimming with sparkle and ready to display.
Opulent Ornaments
It’s all done with regular, inexpensive dressmaker pins, not fancy-schmancy silk or piecing pins. The key is to layer luminous beads with iridescent sequins; I pile one sequin on another for interesting effects. It’s a More is MORE moment!
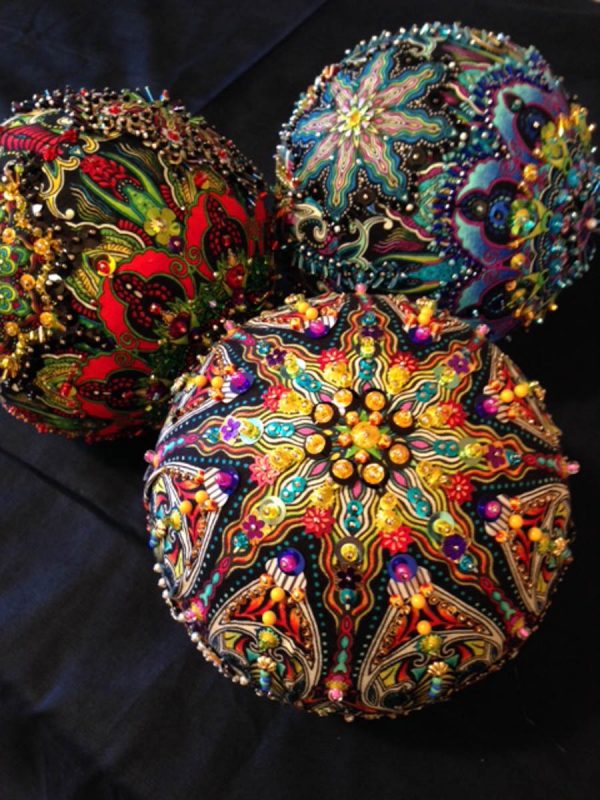
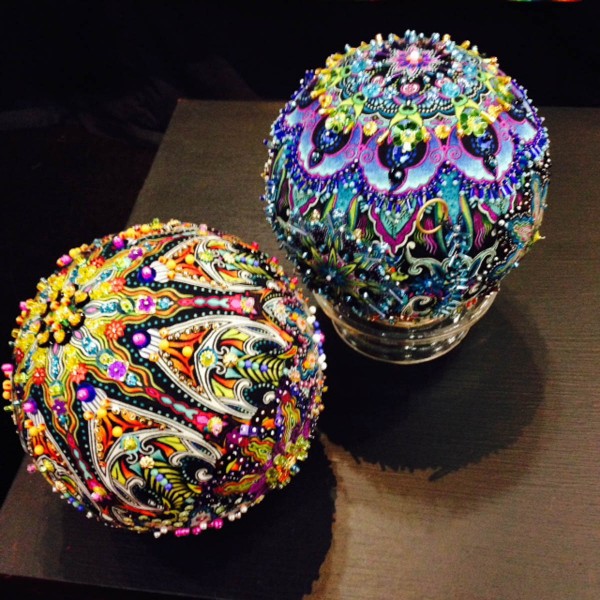
About thirty ornaments—some on candlesticks, others filling a wrought iron basket—spill along the top of a 7 ft. long x 1 ft. wide x 3 ft. high rosewood cabinet in the living room of my New York City apartment. Sitting under a quilt and behind a couch, the unit was built to store rolled up quilts.
Opulent Ornaments
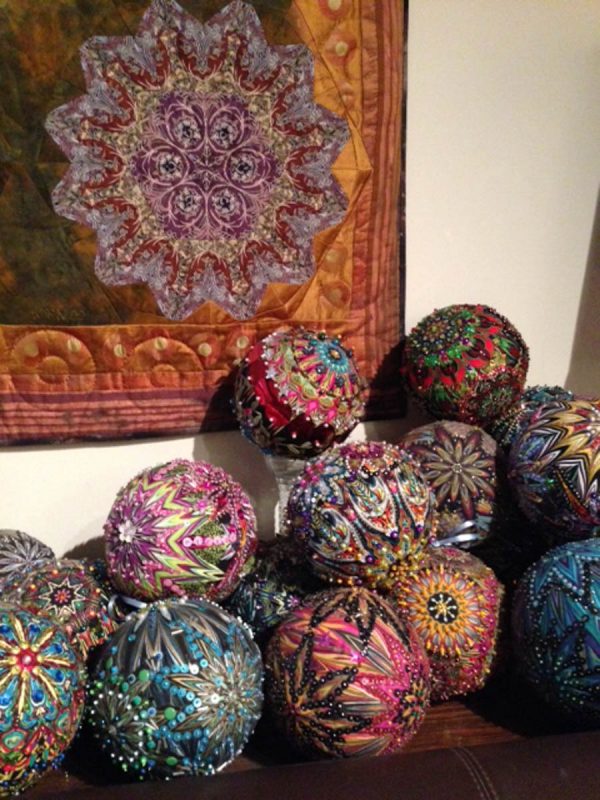
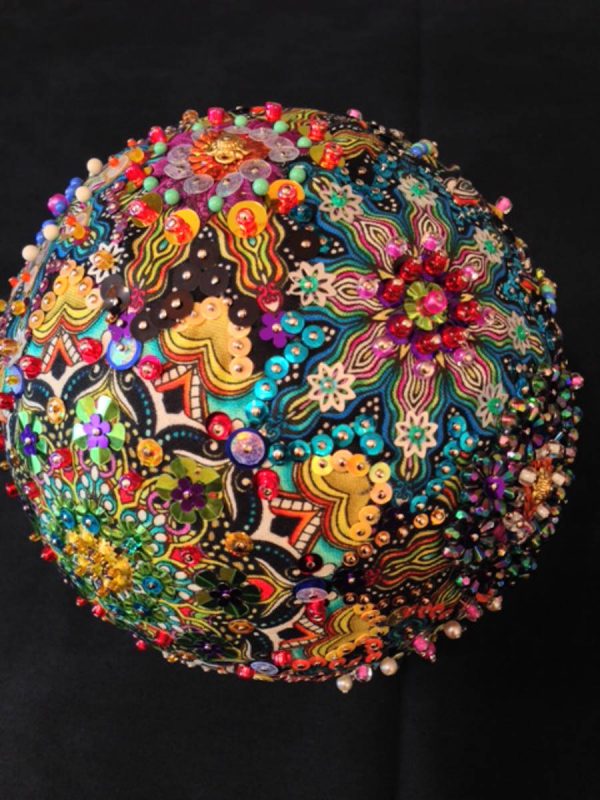
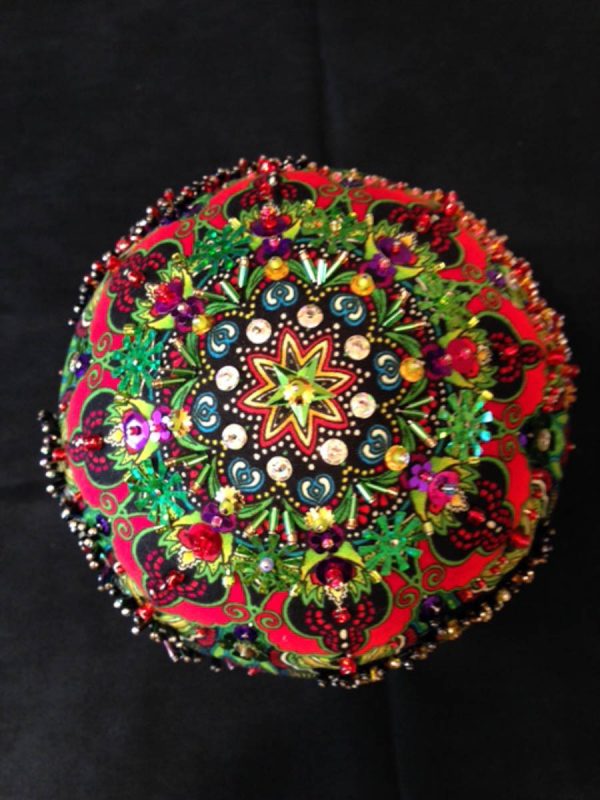
Here are images of the most recent ones I’ve made with my friend Katherine Knauer.
Opulent Ornaments
Opulent Ornaments
Opulent Ornaments
Opulent Ornaments
Opulent Ornaments
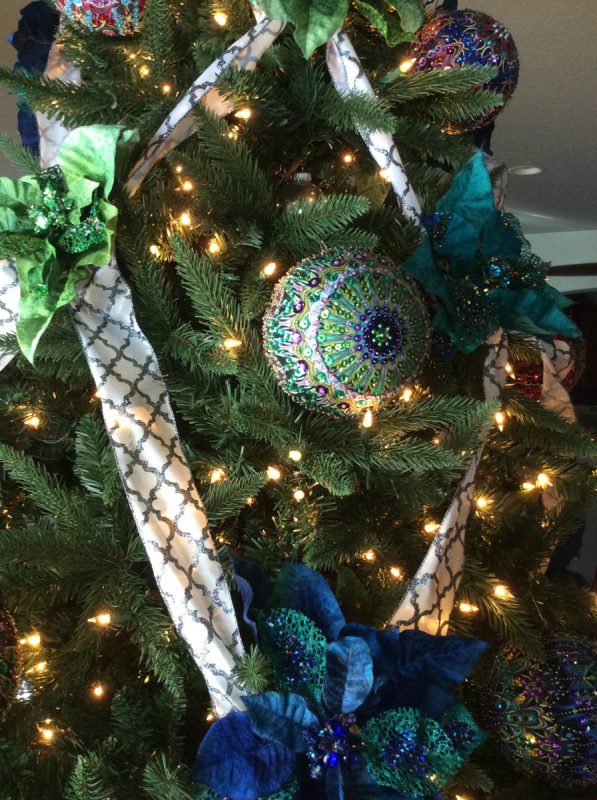
Now I get to introduce you to Karen Selva from Colorado Springs, CO. Karen spent twenty-four years in the Air Force before retiring as a colonel.  Her three kids are grown and she works on a variety of craft genres to her heart’s content.
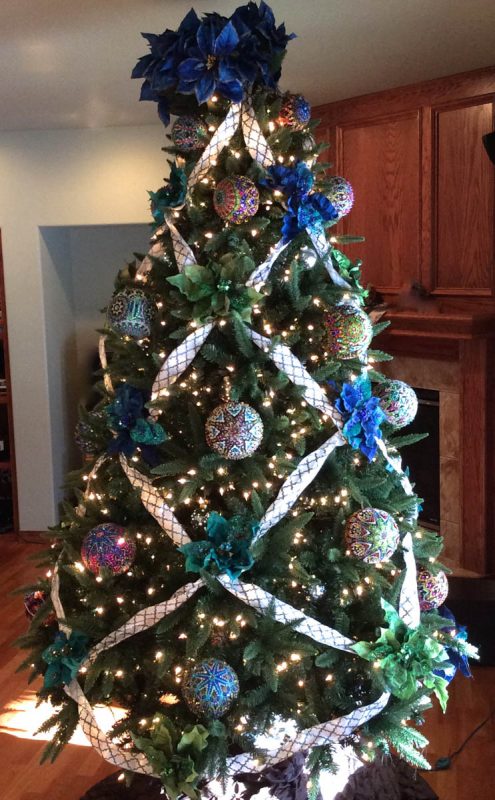
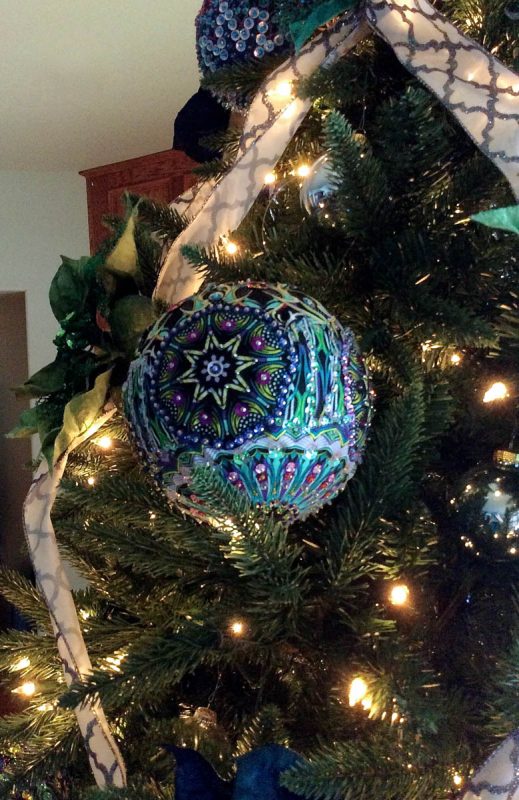
This year, one of Karen’s six Christmas Trees is a fabulous 7 ft. tall tree adorned with twenty-four bejeweled balls. The tree is raised up a foot on a table covered with brown, quilted fabric. Karen started making the ornaments before last Christmas.
Opulent Ornaments - Christmas Tree
Here’s some of what she has to say:
“Making the ornaments was a creative outlet. Following the beautiful designs of the fabric allowed me to make essentially the same things but different every time as the mood moved me. In order to make the balls the focal point, I used ribbon to separate the tree into diamond shaped areas where a ball could sit front and center as the star of the show. I found blinged out poinsettias (think glitter) in the same colors as the fabrics to center where the ribbons cross, keeping the attention on the balls.  There are 24 balls total: 16 six inch balls, 4 five inch balls and 4 four inch balls.  Those smaller eight are at the top of the tree to give it the illusion of being taller. I have another three ornaments on the mantel and another three (one in each size) that will sit on the buffet table in the dining room.”
To attach the ornaments to the tree, Karen glued two long 2″ eye hook needles, putting E6000 glue on the needle which is pushed into anywhere on the ball against a sequin to make it blend in. The glue does not go through into the Styrofoam but does firmly connect the eye hook to the fabric.  Then she used a regular ornament hook, wrapping it firmly around the tree limb to secure it.  To ensure stability, she makes some of the limbs support the larger balls just in case the glue does not want to hold.
Opulent Ornaments on Christmas Tree
Please download the instructions: Opulent Ornaments Instructions.
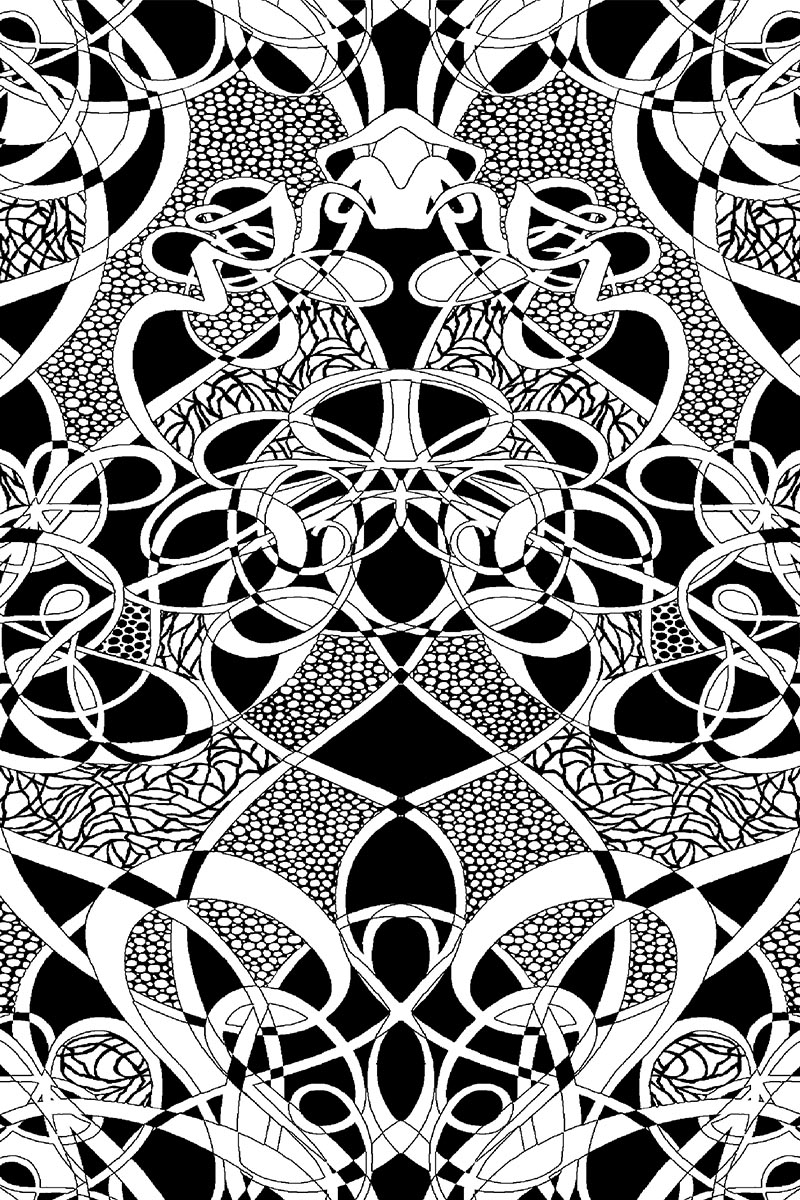
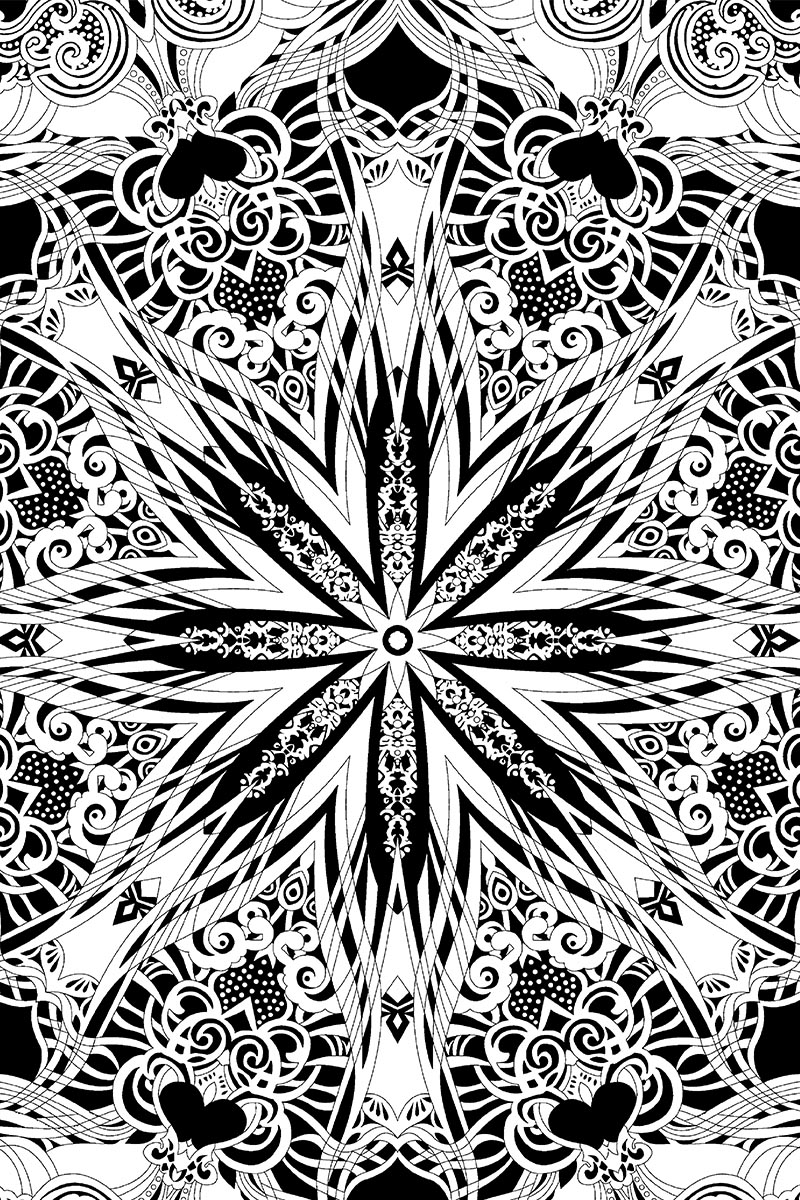
Here is a list of fabric types you’ll want to look for:
You might even find you already have some in your stash.
Opulent Ornaments on tree
Opulent Ornaments on Christmas Tree


Wednesday, December 9, 2015

CHROMOZONE NOW AVAILABLE ONLINE FOR PREORDER!

Paula Nadelstern's (The Kaleidoscope Queen) newest lines - ChromaZone and the new Sunstone Collection - are now available online for PreOrders.  Expected delivery is late February 2016/early March!  

There are four different color ways - Red/Green (Christmas), Caribbean (very bright), Multi and Blue for each design.The first is her newest panel - Dragon Medallion.  The one we're showing you is her Caribbean one - yellows, turquoise, pinks.   As with all her panels there are 6 large medallions, 10" in diameter.  Three different designs, two of each.  Then there are 12 smaller ones - 3 designs, four of each measuring 3 1/4" in diameter.  The second piece is Magmatude. In this Prima Donna there are two different motifs.  One is 8" in diameter, and then there's a smaller, 4 1/2" diameter.  The repeat is 15" however a 1/2 yard will give you 8 full repeats of both motifs.  The third is Filigree. Interestingly enough, Paula tells us  that this piece was originally designed to go in her last collection Fabracadabra.  However since that line was huge, it was decided to hold off until the next collection.  This is quite unusual because she uses a white as the "filigree" pattern over the colored motifs - all is bilaterally symmetrical.   The repeat is large, 24".  And it appears that you will need 1 1/3 - 1 1/2 yards to get 8 full repeats of each motif.  The final design is Vox.  Vox does somewhat remind me of a voice recording meter (if you've ever seen one).  This striped pattern runs the length of the selvage. The repeat is 12", however it does appear that 1 yard will allow you to get 8 full repeats of each design you see in the pattern.

What is very different about each of these new bilaterally symmetrical designs is she did not use a black outline in her design.  Therefore each is a bit less defined, though the coloration of each will work with her more recent lines.   Below is a sample of each new design.


The final picture is of the eight new Sunstone colors that work magnificently with the ChromaZone line - very bright in coloration, except for her new black - haha.  This black is unbelievably fabulous, really.